| Have you ever been to a Web Page and seen images and blocks of text appear and disappear in pretermined places? Well fear no more because The Professor is going to show you how to do it and it is really quite simple. You can see an effect of this as you move your cursor down the page. Notice that the text
is beginning to over write the image of the Prof as this tutorial is being written. |
| |
| |
| |
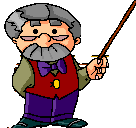
| This was accomplished by decreasing the size of the image, using html, by 1 pixel and adding the transparency attribute to the image code like this.
|
|
<img src="profteach.gif" width="136" height="127" transparency="60%" alt="prof">
|
|
| It is not the intent of this tutorial to present all aspects of CSS Coding, but rather to show you how to enhance your Web Pages with blocks of text and Images that can be made to appear and disappear, using simple Mouseover and Mouseout commands, in predetermined locations.
|
Getting Started |
| The first order of business is to set up our document properly. This will be the order that the document must follow. |
<html>
<head>
<style type="text/css">
</style>
<title>The title of your page</title>
</head>
<body>Your page coding
<div id="name">
Data contained in ths division
</div>
</body>
</html>
|
|
| There are two basic elements required to postion your data. The first is the <style> tag, which goes after your opening <head> tag, and will contain all of the information regarding postioning of your blocks of data. |
| The second element is the <div id="name"> tag. This element contains the data that is to be displayed.
|
The <style> tag |
| These are the standard components of a style tag which we are going to examine.
|
|
<style type="text/css">
#image{position:absolute;top:150;left:10;width:136;height:127;}
#text{position:absolute;top:220;left:250;width:200;height:30;}
</style> |
|
Notice that the format for image and text are identical. Any names can be used but it is a good idea so assign names that correspond to the block of data that is being used as it makes editing a lot easier.
<style type="text/css"> informs the browser to look for data between it and the closing </style> tag. |
| #image | The # sign identifies a block of data specified by the name that follows it. In this case image
|
| { | This is the start of the data. |
| postion: | We are going to specify the postion of our data. |
| absolute; | The values are absolute meaning that negative values can be specified for top and left. |
| top:150; | The data will start 150 pixels down from the top. |
| left:10; | The data will start in 10 pixels from the left. |
| width:136; | The data will have a width of 136 pixels. |
| height:127; | The data will have a height of 127 pixels.
| | } | This is the end of the data. |
|
Visibility |
| visibilty: when used in an element of the of the <style> tag, asks the question. Do you want the data contained in the <div id="name"> to be visible or hidden? The data contained in the <div id="name"> will be visible if visibility:visible; is not specified in the <style> element. |
|
<style type="text/css">
#image{position:absolute;top:150;left:10;width:136;height:127;visibility:visible;}
#text{position:absolute;top:220;left:250;width:200;height:30;visibility:hidden;}
</style> |
|
| visibility: | What visibily do you want? |
| visible; | Data will remain visible until instructed to change |
| hidden; | Data will remain hidden until instructed to change |
|
| The instructions to change will be contained in the Mouseover and Mouseout commands and will be discussed on another page. |
<div id="name">
|
| The name used in this element <div id="name"> must have the same name as specified in the <style> element. If not, your data will still appear but not in the intended place.
|
<div id="image">
<img src="profteach.gif" width="136" height="127" alt="prof">
</div>
| |
| This type of <div> is quite straight forward. You just write your image code in the normal fashion. |
<div id="text" align="center">
<font color="#ffffff">
<b>Pretty cool effect Huh!!</b>
</font>
</div>
| |
Text is a bit trickier. Lets say that you had a text string of 150 characters, separated by some <br> tags, but you only specified a width 100 and height of 50 in the <style> element. This element will compress your text string to the width specified, which I'm sure that is not what was intended.
The solution is quite simple. Just put your text in a table and use the same width and height for the <style> element and your table. Then just adjust your table and <style> element parameters until they produce the desired effect. Always set a border of 1, when using this technique, and then remove it, and the table if desired, when finished. Normal alignment attributes apply to <div> elements. |
| The <div id="name"> element can be placed anywhere on your document that is convenient. My personal preference is just before the closing </body> tag as it makes editing easier.
|

|
  |
|
|